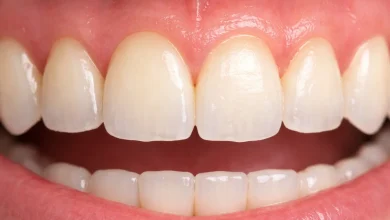
You look at your teeth in the mirror and see what your dentist sees right away. One tooth is not just one color. The edge may look brighter, the middle may look warmer, and the area near the gum may have a little more depth. If you need a crown, veneer, or bonding, that mix of shades can make you nervous. You do not want dental work that looks flat, chalky, or too white next to teeth that have natural variation, which is why many patients trust Knoxville dental care professionals.
That is where dental color mapping helps. Instead of picking a single shade and hoping it blends in, your dentist can record the different tones, translucency, and surface details across the tooth. Dental shade mapping matters most when a tooth has several natural shades, because natural teeth almost never look like one block of color. Good cosmetic planning aims to match what is already there, not replace it with something that looks artificial.
Natural teeth have layers, and single shade matching often misses them
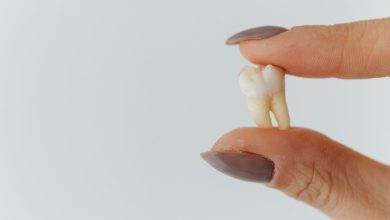
Teeth are built in layers, and that affects color. Enamel is partly translucent, dentin underneath adds warmth, and light reflects differently from the biting edge than it does near the gumline. Age, enamel thickness, stains, hydration, and even room lighting can change what a tooth looks like from one moment to the next. MedlinePlus explains that tooth color changes can come from both surface stains and deeper causes, which is one reason a simple shade tab is not always enough for treatment planning. You can read more about causes of tooth discoloration there.
If you have ever seen a restoration that looked too solid or too bright, this is usually why. The lab or clinician may have matched one basic shade but missed the internal character of the tooth. A front tooth often has a more translucent edge, faint white markings, or a soft shift from warm to cool tones. Without a color map, those details can disappear.
This is especially relevant in general and cosmetic dentist care, where appearance and function meet. A filling on a back tooth can be judged mostly by comfort and fit. A veneer or crown on a front tooth gets judged the second you smile.
Dental color maps create a more precise plan for multi shaded teeth
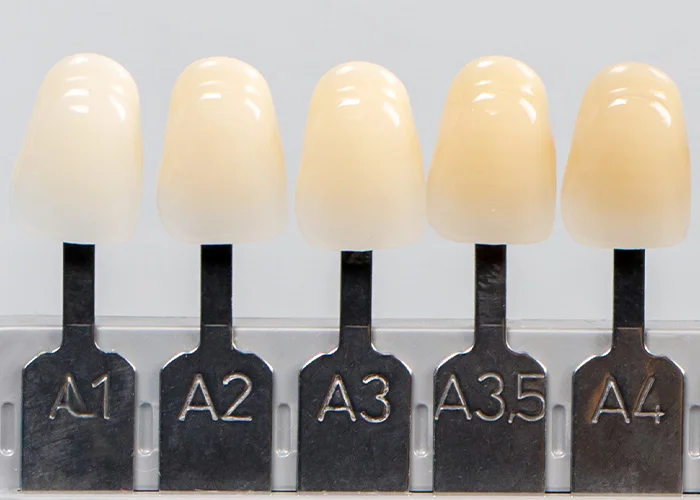
A dental color map is a visual record of how color is distributed across a tooth. It may note the cervical third near the gum, the middle third, and the incisal third at the edge. It can also include translucency, texture, craze lines, opacity, and areas of brightness. In other words, tooth color matching becomes more detailed than choosing A2 or B1 on a shade guide.
You may be dealing with one darkened tooth after trauma, several teeth with natural variation, or an old crown that never matched well. Each case needs a different approach. If one front tooth is darker because of injury or prior root canal treatment, the dentist may need to decide whether whitening, internal bleaching, bonding, or a crown gives the most natural result. The medical background behind tooth injuries and color change is outlined in the NCBI overview of tooth discoloration and related causes.
Photography has also become a major part of shade communication. Standardized photos help capture details that are easy to miss during a short appointment. The University of Iowa has even supported research focused on evaluating photography for shade matching, which reflects a simple truth. Better records usually lead to better esthetic results.
Professional shade mapping gives more control than visual guesswork
When several natural shades are present, guesswork costs time and money. A restoration that comes back too gray, too opaque, or too uniform may need adjustments or a full remake. That means more appointments, more waiting, and more frustration. You may already feel worn down if you have had work redone before and still do not like how it looks.
The difference between a basic shade check and a mapped approach is often easy to see.
| Approach | What It Uses | Best For | Main Limitation |
| Single shade selection | One shade tab match | Simple restorations, less visible teeth | Can look flat on teeth with multiple tones |
| Visual multi zone mapping | Shade tabs plus notes on different tooth areas | Front teeth with visible color variation | Depends heavily on lighting and observer skill |
| Photo based shade mapping | Clinical photos with shade references | Crowns, veneers, bonding in the smile zone | Needs consistent technique and communication |
| Digital color analysis | Shade matching devices or software | Cases needing added precision | Technology still needs human judgment |
A skilled cosmetic dentist often combines methods instead of relying on one. That balance matters because teeth are not paint chips. They respond to light, they pick up surrounding colors, and they can look different when dry than when fully hydrated. A restoration that looked perfect under one light can look off outdoors if the planning was too narrow.
Small details change the final look of cosmetic dental work
Color is only one piece. Surface texture, gloss, shape, and translucency all affect whether a restoration disappears into your smile or stands out. Two crowns can share the same base shade and still look completely different if one is too smooth or too opaque. This is why understanding dental color maps for teeth with several natural shades matters in real life, not just in theory.
If you are considering bonding, veneers, or a crown, ask how the office handles multi shade teeth color mapping. That phrase may sound technical, but the goal is simple. Your restoration should match the way your natural teeth actually look, not the way they look on a basic chart.
Three steps help you prepare for a better shade match
1. Schedule shade selection before major whitening changes. If you plan to whiten your teeth, do that before final shade selection for crowns or veneers. Natural teeth can lighten, but ceramic will not change once it is made. Matching first and whitening later often leaves the restoration behind.
2. Bring real world photos of your smile. Photos taken in natural light can help show how your teeth usually appear, especially if one tooth changes color in certain settings. This is useful for front tooth work where tiny differences are easy to notice.
3. Ask how the dentist communicates with the lab. You want more than a shade code on a form. Ask whether the office uses close up photography, color maps, surface texture notes, and custom lab instructions. This is one of the clearest signs of careful cosmetic planning.
If you have been worried that your teeth are too uneven in color to match well, that worry makes sense. Natural variation is exactly what makes cosmetic work harder, and it is also what makes a good result look real. The right planning respects those differences instead of trying to erase them. If you are exploring care with a general and cosmetic dentist, ask for a consultation focused on shade mapping and restoration planning so your final result has the best chance to blend in naturally.