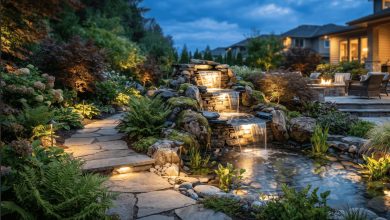
A well-designed exterior should remain attractive and practical after sunset. Plants, pathways, fences, masonry columns, and entrance gates may define a property during the day, but thoughtful lighting determines how those features appear at night. The right fixtures can guide visitors, make steps and boundaries easier to see, and give the entire home a warmer, more finished appearance.
Pillar lights and post cap lights are especially useful because they combine decoration with functional illumination. Although the two fixture types are sometimes confused, they are designed for different mounting surfaces. Understanding those differences—and planning their placement carefully—can help homeowners create an exterior that feels comfortable, organized, and welcoming.
Understand the Difference Between the Two Fixtures
Pillar lights are generally installed on broad, flat surfaces such as brick columns, stone gateposts, concrete piers, and wide masonry walls. They typically have a flat mounting base that can be secured directly to the top of the structure. Their larger size and decorative form make them suitable for prominent areas such as driveway entrances, gates, patios, and front boundaries.
Dazuma’s collection of Pillar Lights demonstrates how this category can include modern geometric fixtures, traditional lantern-inspired designs, solar models, and weather-resistant LED options. The variety allows homeowners to coordinate the lighting with both the architecture and surrounding landscape.
Post cap fixtures are usually made to fit over the top of a narrower wooden, metal, or vinyl post. They are commonly used on decks, fences, railings, and outdoor stairways. Their purpose is not only to add light but also to give an unfinished post a cleaner and more intentional appearance.
Start with the Areas That Need Light Most
Before choosing a style, walk around the property after dark. Notice where the ground becomes difficult to see, where visitors may be unsure about the entrance, and where steps or changes in elevation create possible hazards. These observations will reveal where lighting can provide the greatest practical benefit.
Driveway pillars are natural locations for larger fixtures because they help identify the entrance from the street. Fence posts can define the edges of a yard, while lights near deck stairs and railing corners improve visibility for people moving through outdoor entertaining areas. Lighting every available surface is rarely necessary. A few carefully selected positions often produce a more attractive result than a large number of competing lights.
Use Pillar Lights to Frame Important Features
Masonry pillars have strong visual weight, so leaving them completely dark can make an entrance disappear at night. A pair of matching fixtures can frame a driveway or gate, establish symmetry, and draw attention to stone or brickwork. They may also help drivers judge the width of an entrance more easily.
These fixtures should feel proportional to the structure beneath them. A very small light may look accidental on a wide column, while an oversized lantern can overwhelm the masonry. As a general starting point, consider a fixture measuring approximately one-quarter to one-third of the pillar’s width. The exact proportion can vary according to the fixture’s shape and visual weight.
Open metal frames tend to appear lighter than enclosed lanterns of the same dimensions. Dark finishes also create a stronger visual presence, while clear glass and slim outlines can make a fixture feel less bulky.
Use Post Cap Lights to Define Decks and Fences
A row of Post Cap Lights can outline a deck or fence without producing the intensity of a floodlight. Their lower position creates small pools of illumination that help people recognize boundaries, corners, railings, and changes in level.
Spacing is important. Installing a light on every fence post may be suitable for a large open property, but it can appear overly busy in a compact yard. Another approach is to illuminate corner posts, gates, stair landings, and selected posts along long sections of fencing. This creates a clear rhythm while keeping the atmosphere soft.
Post cap fixtures can also improve the finished appearance of exposed post tops. A properly fitted cap helps shield the upper surface of a wooden post from direct exposure to rain and snow. It should still be installed according to the manufacturer’s instructions so that moisture is not trapped against the wood.
Measure Every Surface Before Ordering
Accurate measurements are essential, especially for post cap lighting. A post described as four inches by four inches may have smaller actual dimensions after milling. Do not rely only on the nominal lumber size or the original construction plan. Measure the top of each existing post with a tape measure before selecting a fixture.
Check whether the product is designed to fit over the outside of the post or attach to its top surface. Some fixtures include adapters for different post sizes, while others require an exact match. Measuring several posts is also helpful because older wood may have changed shape slightly over time.
For masonry installations, measure both the pillar and the flat mounting area. Make sure the fixture’s base can sit securely without extending beyond the edges or rocking on an uneven surface.
Select a Comfortable Level of Brightness
Outdoor lighting does not need to make the property look like daytime. Its purpose is to improve orientation, support safety, and create atmosphere. Fixtures placed near seating areas should produce a comfortable glow rather than shine directly into people’s eyes.
Warm white light often works well around homes because it complements wood, brick, natural stone, and landscaping. It also tends to feel more relaxing than a very cool light. However, areas used for practical tasks may benefit from slightly brighter or more neutral illumination.
Try to maintain a consistent color temperature across nearby fixtures. A warm pillar light beside a cold blue fence light can make an otherwise coordinated exterior feel disconnected. Lumens provide a better indication of brightness than wattage, particularly when comparing LED products.
Decide Between Solar and Hardwired Lighting
Solar fixtures are convenient where running electrical cable would be difficult or expensive. They can be installed along fences, decks, and remote boundaries with minimal disruption. Their performance, however, depends on the amount of direct sunlight received by the solar panel. Trees, roof overhangs, walls, and seasonal weather can reduce charging time.
Hardwired low-voltage lighting usually provides more dependable and consistent output. It is a strong option for shaded yards or properties where the lights must operate for many hours every night. The initial installation may require more planning, cables, a transformer, and professional electrical assistance.
Homeowners can also combine the two systems. Hardwired fixtures may serve the main driveway and entrance, while solar lights provide softer accents along secondary fences or garden boundaries.
Choose Materials Made for Outdoor Conditions
Exterior fixtures must tolerate sunlight, rain, temperature changes, dust, and wind. Look for products specifically rated for outdoor use and check whether the rating is appropriate for the installation location. Fixtures in fully exposed areas need greater protection than lights installed beneath a covered porch.
Powder-coated aluminum, stainless steel, tempered glass, and UV-resistant materials are common choices. Coastal properties require additional attention because salty air can accelerate corrosion. Finishes should also be considered practically: intricate frames may collect dirt, while simple shapes are often easier to clean.
Install the Fixtures with Water Management in Mind
Even a weather-resistant fixture can fail if water enters through an improperly sealed connection. Masonry surfaces are not always perfectly level, so a pillar light may leave small gaps around its base. Exterior-grade sealant can help protect the connection, but drainage must be considered as well. Follow the product instructions rather than sealing openings that are intended to release condensation.
Post caps should be secured firmly enough to resist strong wind while remaining removable for maintenance. Permanent adhesive may make it difficult to replace a battery, bulb, or damaged fixture. Screws or manufacturer-provided mounting hardware usually offer a more serviceable solution.
Any hardwired installation should be completed or inspected by a qualified electrician. Outdoor electrical connections must comply with local requirements and be protected against moisture.
Create a Unified Exterior Design
The lights do not have to be identical, but they should share a visual relationship. Repeating a finish, glass type, geometric shape, or color temperature can connect fixtures used on different parts of the property. For example, larger black lanterns on stone pillars can coordinate with smaller black caps along a wooden fence.
Consider the appearance of the home from both the street and outdoor living areas. The goal is to create a gentle sequence of light that leads from the driveway to the entrance, patio, deck, or garden without allowing one fixture to overpower everything else.
Maintain the Lighting Throughout the Year
Clean lenses and solar panels periodically so dirt does not reduce light output. Trim plants that block the fixtures, inspect mounting screws, and check for signs of corrosion or trapped moisture. Solar models may eventually need new rechargeable batteries, while hardwired systems should be checked if several lights begin dimming at the same time.
With correct sizing, durable materials, thoughtful placement, and regular care, pillar and post cap lights can improve more than nighttime visibility. They can highlight architectural features, define outdoor spaces, and give the property a polished appearance that welcomes residents and visitors every evening.