Kitchen lighting is important.
Like, really important.
Unfortunately, most people completely miss mark when it comes to lighting their kitchen.
They install one overhead fixture and maybe some LED strips underneath their cabinets. BAM. Finished product.
The sad reality is that a single light source just isn’t enough. Suddenly your kitchen feels flat, lifeless and more sterile than inviting. Lighting is everything in a kitchen. The atmosphere, the functionality, the wow factor—it all comes down to lighting.
Don’t believe us? Let’s dive into kitchen light layers.
What You’ll Learn
- What Is Layered Lighting?
- Task, Accent, Ambient: The Three Must-Have Lighting Layers
- How to Pick Lighting Fixtures for Each Layer
- Avoid These Common Layering Mistakes
What Is Layered Kitchen Lighting?
When it comes to kitchen lighting, one light just won’t cut it. Layering your lighting helps add depth and character to your kitchen. Rather than depending on one central overhead light, every layer has a purpose:
- Ambient lighting: refers to the overall lighting in the room
- Task lighting: lights up work areas like countertops
- Accent lighting: showcase specific features in your kitchen
Layering your lighting is like building a puzzle. Every piece serves a purpose and fits together with every other piece. One light alone can’t create great ambiance, but together they can.
As of 2023, the kitchen lighting market reached $15.69 billion. Homeowners are holding themselves to a higher standard than one central ceiling fixture. Layering your kitchen light fixtures with purpose is one of the best ways to upgrade the space.
The 3 Layers of Kitchen Lighting You Need
Now that we know what lighting layers are, let’s review the 3 you need in your kitchen:
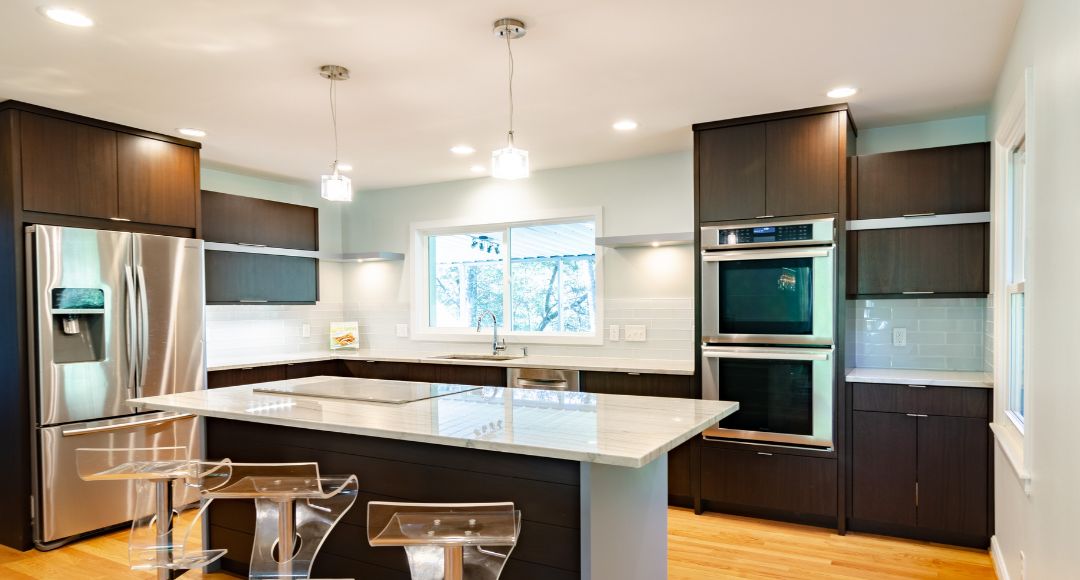
Kitchen Lighting Layer 1: Ambient Lighting
Ambient lighting is the base level of light in your kitchen. These are your overhead fixtures that illuminate the space. They usually consist of either recessed ceiling lights or flush mount fixtures.
When selecting the perfect ambient light for your kitchen, look for dimmable fixtures. Being able to dim your lights can make a huge difference at night when preparing dinner versus bright morning light.
Kitchen Lighting Layer 2: Task Lighting
Task lighting is exactly what it sounds like; these lights help you complete a task. Whether that be chopping veggies on your countertops or working on recipes at your kitchen island.
If there’s one layer most kitchens are missing, it’s task lighting. Not having proper lighting right on your countertops can make food prep nearly impossible. Some popular options for layering in task lighting include:
- Under cabinet lighting
- Pendant lighting hung over kitchen islands
- Direct overhead lights focused on the stove top or sink area
Kitchen Lighting Layer 3: Accent Lighting
The final layer is accent lighting. For many homeowners this is an unnecessary luxury. But when used correctly, accent lights really make a kitchen complete.
Accent lighting is exactly what it sounds like: accentuating a specific area. A popular way to utilize accent lighting is to showcase open shelves or a unique tile backsplash.
Light strip kits inside glass cabinet doors are another great way to add some personality to your kitchen.
How to Pick the Perfect Fixtures for Each Layer
Picking the correct fixture for each layer can be stressful. Purchasing new lights for your kitchen shouldn’t require a degree in interior design. When searching for the right light for each job, focus on what each layer needs to do:
Ambient Lighting: This is your base level of light. Instead of reaching for just any overhead fixture, look for warm color temperatures. A range of 2700K-3000K creates a cozy and inviting feel.
Task Lighting: This layer helps you complete work throughout the kitchen. For task lighting, overshoot some bulbs with a higher BLEN (brightness). You want bright and focused lighting for all of your countertops.
Accent Lighting: These lights aren’t meant to help you work. Instead, focus on the aesthetics of each light fixture you add as accent lighting. You can really have some fun with these ones!
One tip for all layers: Switch to LED bulbs wherever possible. LED light bulbs save you money on energy bills. Over time those savings can add up to help pay for your new lighting!
Mistakes To Avoid When Layering Your Lighting
Avoid these 4 common lighting layer mistakes…
Not every light in your kitchen needs to be connected to a dimmer, but your layers should. Each layer is adjustable for a reason. Don’t limit yourself by using a single dimmer for the whole kitchen.
Using bulbs with different color temperatures creates a cool versus warm vibe. Instead, pick a color temperature range and stick with it across all lighting layers.
Skip the accent layer and you’ll never reach your kitchen’s full lighting potential. This is an easy layer to install but makes a huge difference.
Under-cabinet lights sound great in theory. But if they’re not installed correctly, you’ll still be left in the dark. Make sure your cabinets are installed at the front of your cabinet instead of the back.
Wrapping Things Up on Layered Lighting in the Kitchen
Kitchen Lighting Formula:
Ambient Lighting ► Task Lighting ► Accent Lighting
Install dimmers for each layer.
Stay consistent with color temperature.
Oh, and did we mention switching to LED lightbulbs saves ≈$225/year?
Forcing all of your lighting to work in conjunction with one another is the only way to reach your kitchen’s full potential. Sure, you can bake cookies with just the oven light on, but why would you?
Your kitchen has room for all three layers of lighting. Don’t stop at just ambient lights!
Closing Thoughts
You now know all about the different kitchen lighting layers. Every kitchen needs:
- Ambient Lighting
- Task Lighting
- Accent Lighting
Layering your kitchen lights fills your home with depth and character. It’s not just about seeing what you’re working with anymore. Using layered lighting is what takes your kitchen from functional to fabulous.
Remember…
Layer 1: Ambient Lights ► Layer 2: Task Lights ► Layer 3: Accent Lights
Stay consistent with color temperature and consider installing dimmers for each layer of lights.
So what are you waiting for? Get out there and start layering those lights!